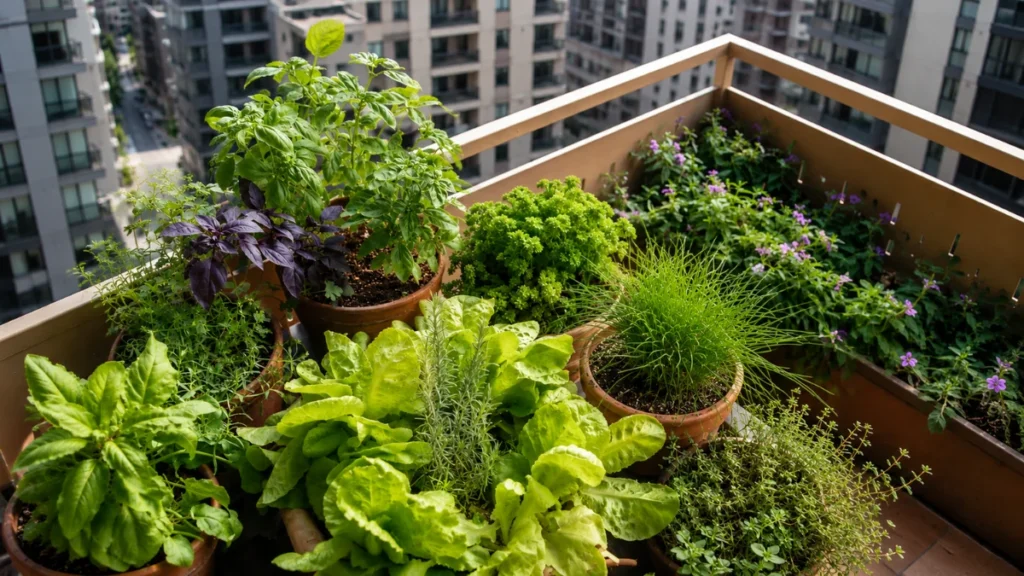
Learning how to start a balcony garden can feel confusing because there are many decisions packed into a very small space. You need to think about sunlight, wind, heat, drainage, pot size, plant choice, watering, and where everything will fit without making the balcony difficult to use.
A practical way to begin is to observe your balcony for several days, choose three to five suitable plants, give each one an appropriately sized container with drainage, and place them where their light and wind needs are most likely to be met. Start small enough that you can notice how each pot behaves before adding more.
You do not need a large budget, matching planters, advanced gardening skills, or a perfectly arranged space. A few well-chosen pots can teach you more than a crowded balcony filled with plants that do not suit the conditions.
This guide explains how to assess your balcony, choose a simple first setup, avoid common beginner mistakes, and build a garden that fits apartment life. It focuses on practical container growing rather than permanent building changes or complicated irrigation systems.
What Do You Need to Start a Balcony Garden?
A first balcony garden does not need much equipment. The most useful starting items are containers with drainage, suitable potting mix, a simple watering tool, and a small number of plants chosen for the conditions you actually have.
| Starting Item | What to Look For | Why It Matters |
|---|---|---|
| Three to five plants | Plants suited to your sunlight, wind, and available space | A small group is easier to observe, water, and adjust. |
| Containers | Correct size, stable shape, and open drainage holes | Roots need enough space without sitting in trapped water. |
| Quality potting mix | A mix made for containers rather than soil dug from the ground | Container mixes drain and hold air more reliably. |
| Watering can or jug | A size you can comfortably carry through the apartment | Controlled watering is more useful than carrying the largest amount possible. |
| Saucers or trays | Wide enough to sit securely beneath each pot | They help manage runoff without blocking drainage. |
| Simple hand tool | A small scoop, trowel, or clean container for moving potting mix | Large garden tools are often awkward in a narrow space. |
You may also find gloves, plant labels, clips, ties, and a small brush useful, but none of these should delay you from starting. It is usually better to buy extra tools after you understand what your balcony garden actually needs.
Why Starting on a Balcony Is Different
A balcony garden behaves differently from a garden at ground level. Plants cannot extend their roots beyond the container, so every pot must hold enough moisture, air, and nutrients for the plant living inside it.
Space is also shared with doors, chairs, washing, storage, pets, and walking areas. A setup that looks attractive in a photo may become frustrating if you need to move six pots every time you open the balcony door.
Wind can be stronger several floors above the ground. Sunlight reflected from windows, pale walls, tiles, and neighbouring buildings can make one corner hotter than the outdoor temperature suggests. Covered areas may receive bright light but very little rain.
Weight and drainage also matter. Wet potting mix, ceramic containers, water-filled trays, and large plants can become heavy. Excess water cannot soak into the ground, so it must be collected and managed without creating slippery floors or dripping onto neighbours below.
These limits do not make balcony gardening too difficult. They simply mean your first decisions should be based on the balcony rather than on a list of plants you like.
A balcony garden succeeds because you understand the balcony, not because you buy more plants.
Observe Your Balcony Before Buying Plants
Spend at least a few days watching the space before buying a large group of plants. You do not need scientific equipment. Basic notes taken in the morning, around midday, and later in the afternoon can reveal most of what you need to know.
Notice where direct sun reaches the floor, wall, railing, shelves, and corners. A balcony may receive sunlight for only two hours in one area but five hours near the outer edge. The pattern may also change as nearby buildings cast shadows.
Watch the wind as well. Look for areas where leaves, curtains, or lightweight objects move strongly. A protected wall corner may feel calm while the railing edge remains exposed.
Also check what happens during rain. Some covered balconies receive almost no water, while others collect wind-driven rain near the railing. Rain exposure affects both watering and plant placement.
For a more accurate method, How to Measure Sunlight on a Balcony explains how to record direct sun without relying only on the balcony’s compass direction.
Follow the Balcony Garden Planning Path
A common beginner mistake is to choose plants first and then search for somewhere to place them. A more reliable order is to understand the balcony first, then choose containers and plants that suit it.
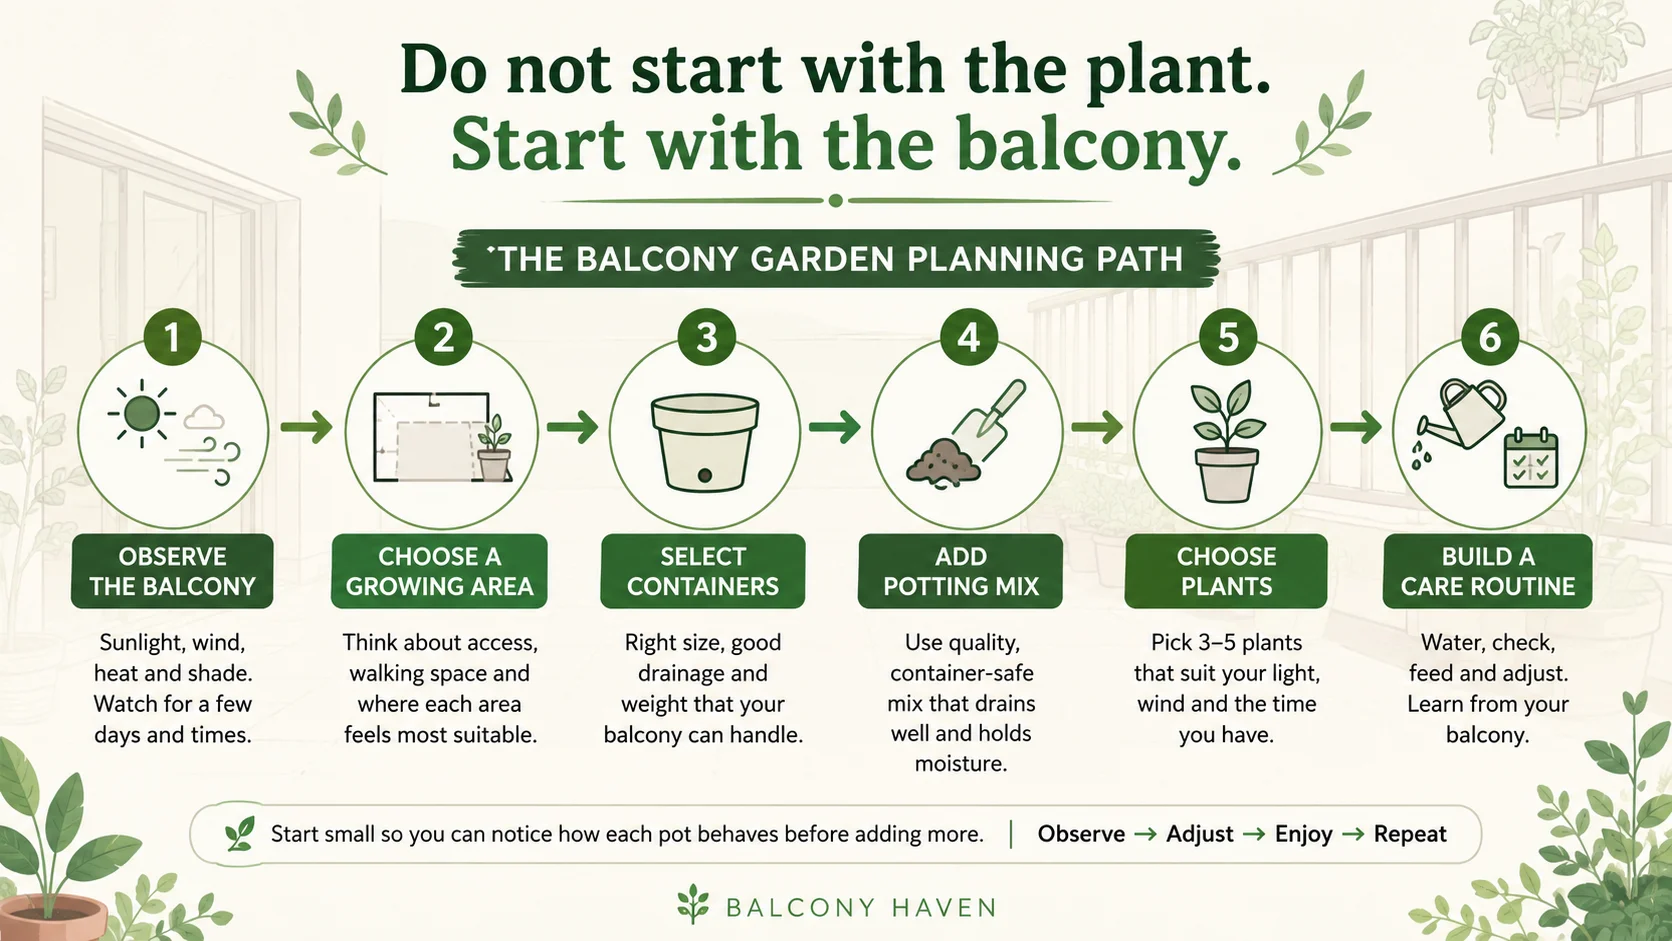
The planning path moves through six stages: observe sunlight, wind, heat, rain, space, and drainage; choose a manageable growing area; select suitable containers; add potting mix; choose matching plants; then establish a watering and care routine.
The order matters because each decision narrows the next one. Sunlight affects plant choice. Plant size affects pot size. Pot size affects weight, watering frequency, and how many containers will fit.
Why Starting Small Usually Works Better
It can be tempting to fill an empty balcony immediately, especially when plants are inexpensive or a nursery display makes everything look easy. However, a smaller first setup gives you time to understand how the space behaves before the garden becomes difficult to manage.
| Starting With a Few Plants | Filling the Balcony Immediately |
|---|---|
| Watering remains quick and manageable. | Watering can become a large daily task. |
| It is easier to notice which pot dries fastest. | Moisture differences can be harder to track. |
| Plants can be moved when light or wind is unsuitable. | Crowding may leave little room for adjustments. |
| Problems are easier to connect to one plant, pot, or position. | Several problems may appear at once and become confusing. |
| The initial cost is lower. | Money may be spent on plants or pots that do not suit the balcony. |
| The balcony remains usable for sitting, walking, and cleaning. | Doors, pathways, and drainage trays may become difficult to access. |
| You can expand based on what you have learned. | You may need to remove or rearrange plants soon after starting. |
Starting small does not mean your garden must remain small. It simply allows the second group of plants to be chosen with more information than the first.
Choose a Small Growing Area First
You do not need to fill the whole balcony. Choose one section that is easy to reach, receives useful light, and does not block the doorway or main walking path.
Starting with a defined area makes it easier to notice how quickly pots dry, whether plants are exposed to wind, and how much time watering takes. You can then expand into other parts of the balcony with more confidence.
A practical first growing zone may be:
- one sunny corner for herbs and compact vegetables
- a low shelf against a protected wall
- three floor pots arranged beside the railing
- one narrow planter plus two separate herb pots
- a small table or stand that leaves the walkway clear
Avoid using every available railing, shelf, hook, and floor edge at once. Leaving open space improves airflow, makes watering easier, and gives you somewhere to move a plant when conditions become too hot or windy.
Choose Containers That Match the Plants
Containers are more than decoration. Their size and material affect root growth, soil temperature, watering frequency, stability, and total balcony weight.
Small pots are light and inexpensive, but they dry quickly and leave less room for roots. Large pots hold moisture longer and support bigger plants, but they become heavy after watering.
Plastic pots are often practical for beginners because they are lightweight and usually hold moisture longer than unglazed terracotta. Fabric grow bags provide good drainage but may dry quickly in exposed wind. Ceramic pots can be stable and attractive, although their weight may make rearranging difficult.
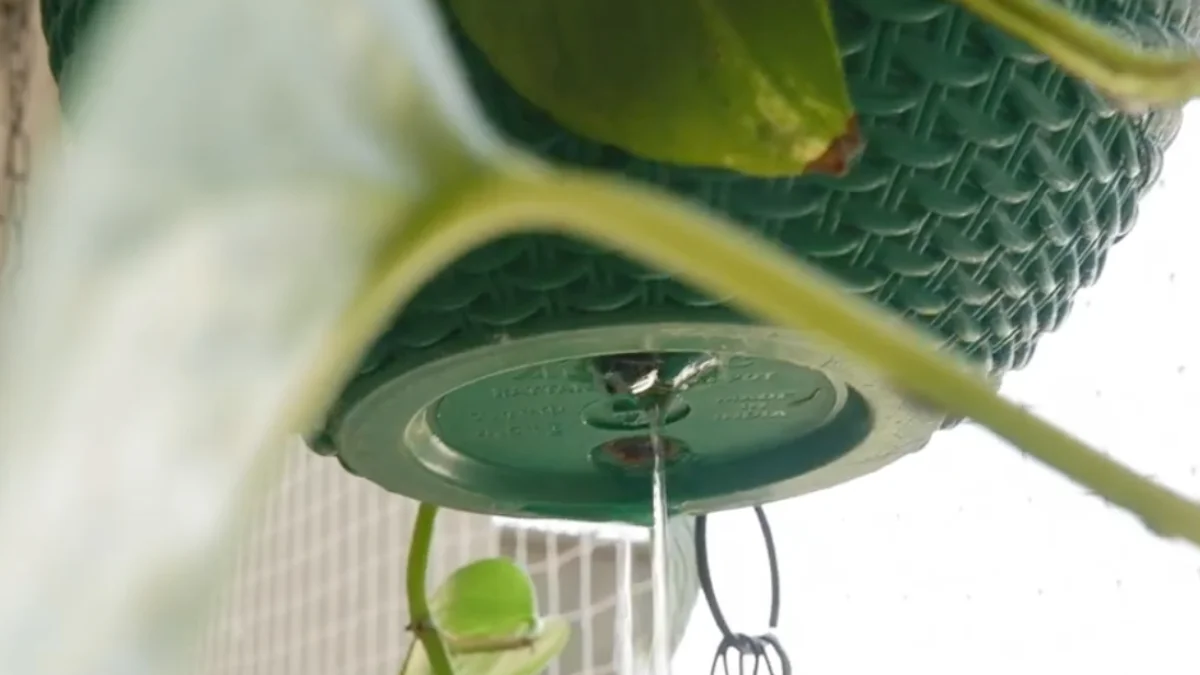
Every growing container should have open drainage holes. Decorative outer pots without holes can still be used as covers, but the planted inner container should be able to drain freely.
If you are comparing sizes, materials, weight, and drainage, How to Choose Pots for Balcony Gardening provides a more detailed balcony-specific guide.
| Plant Type | Useful Starting Container | What to Avoid |
|---|---|---|
| Small herbs such as thyme or chives | Individual medium pot with drainage | Very tiny decorative pots that dry within hours. |
| Basil, parsley, or leafy greens | Medium pot or wider planter | Shallow containers with little moisture reserve. |
| Compact chilli or capsicum | Stable medium-to-large pot | Light top-heavy pots near exposed railings. |
| Tomato | Large, deep container with support | Small pots that restrict roots and dry too quickly. |
| Succulents | Smaller pot with fast drainage | Deep, constantly wet containers. |
Use Potting Mix, Not Garden Soil
Soil dug from a yard or garden bed is usually too dense for balcony containers. It can compact, drain slowly, carry weed seeds, and become extremely heavy when wet.
A quality commercial potting mix is designed to hold moisture while allowing air and extra water to move through the container. Choose a mix suitable for the type of plants you are growing, such as herbs, vegetables, indoor plants, or succulents.
Fill the pot without tightly pressing the mix down. Lightly firm it around the root ball so the plant stands securely, but leave enough pore space for air and water.
Leave a small gap between the top of the potting mix and the rim of the container. This watering space helps prevent soil from washing over the edge.
Do not add a thick layer of rocks to the bottom in an attempt to improve drainage. Good drainage is more closely connected to open holes, suitable potting mix, and correct watering than to filling valuable root space with stones.
Choose Your First Balcony Plants
The easiest first plants are not the same for every balcony. A plant that grows easily in gentle morning sun may struggle in strong western heat. A drought-tolerant plant may rot in a shaded corner that stays damp.
Choose plants by matching three main conditions:
- the amount and timing of direct sunlight
- the strength of wind and reflected heat
- the space available for the mature plant and its pot
For many beginners, a mix of useful and forgiving plants works well. You might begin with one leafy herb, one hardy herb, one compact flowering plant, and one small vegetable suited to your conditions.
Possible starting plants include chives, mint in its own pot, parsley, thyme, rosemary, lettuce in mild weather, dwarf chilli varieties, compact flowers, or suitable succulents. These are examples rather than a universal list.
If you want a broader starting point, What Are the Easiest Plants for Beginners? looks at plant choices according to care needs and growing conditions.
On a very small balcony, it is often more rewarding to grow a few plants you regularly use than to squeeze in large crops. Best Edible Plants for Tiny Balconies includes compact options that provide useful harvests without taking over the space.
Map the Microclimates on Your Balcony
A balcony is rarely one single growing environment. The wall, railing, roof, floor, nearby windows, furniture, and neighbouring buildings can create several small zones only a metre apart.
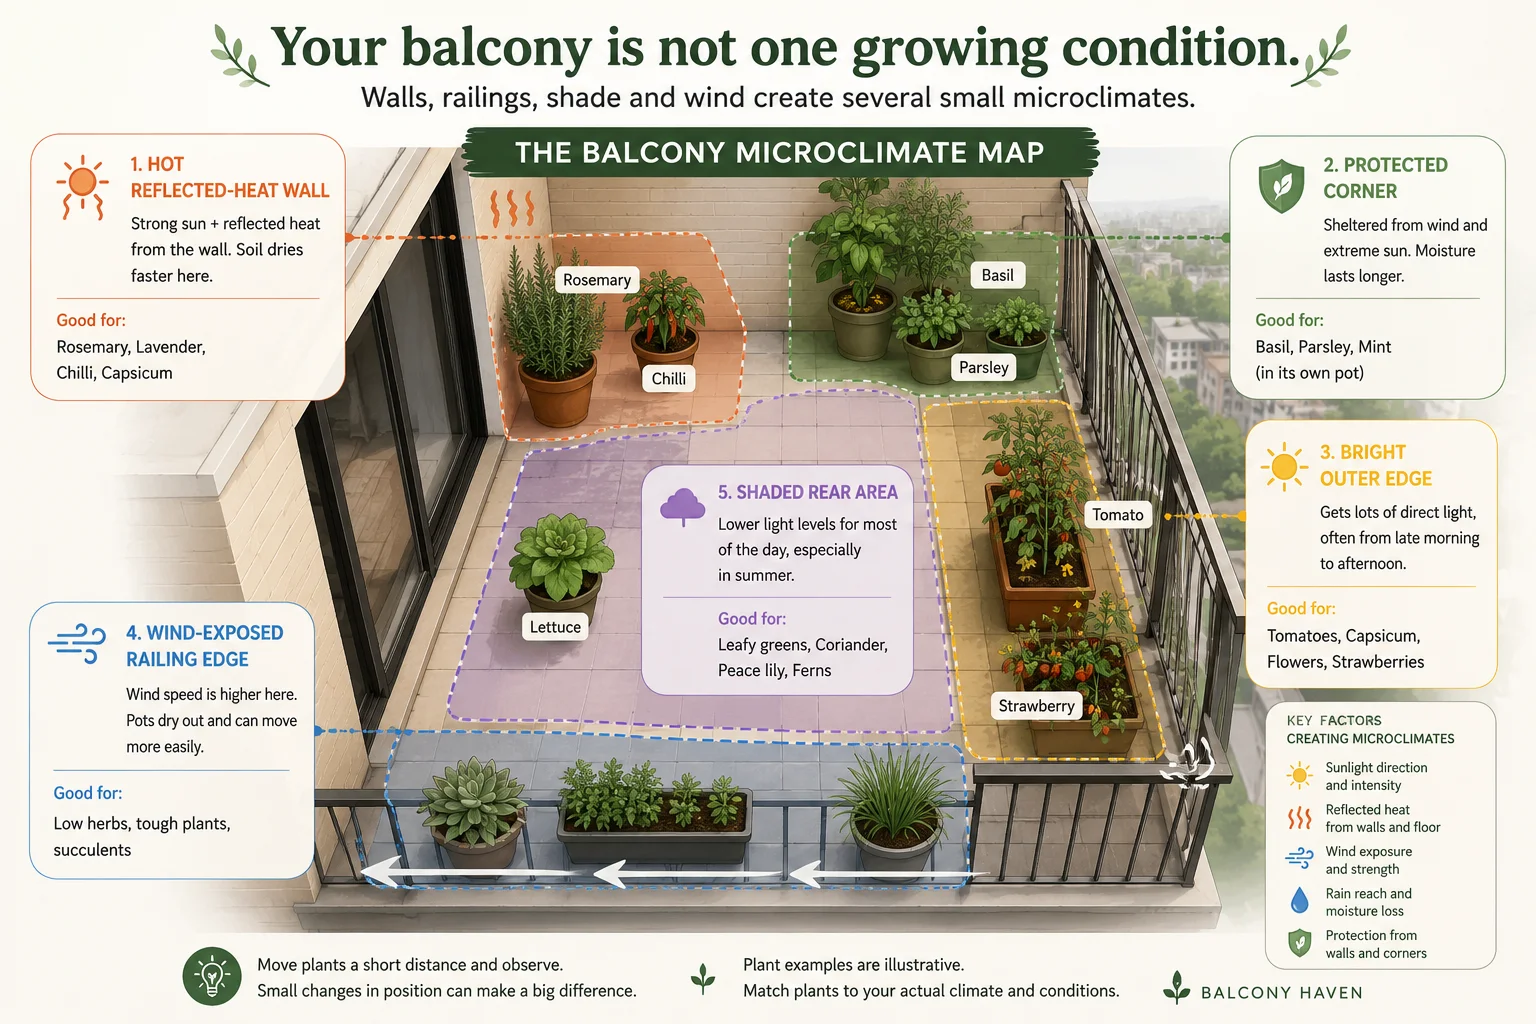
The map identifies the hot wall, shaded rear area, protected corner, wind-exposed railing, bright outer edge, and main walking space. These zones explain why plants placed on the same balcony may need different care.
Moving a pot can sometimes solve a problem more effectively than adding more water or fertiliser.
A basil plant may lose water rapidly at the windy edge but remain more comfortable near a protected wall. A sun-loving plant may grow weak in the shaded rear section but improve when moved towards the brighter outer area.
Arrange Plants Without Crowding the Space
Place taller plants where they will not block too much light from smaller ones. Keep frequently watered pots easy to reach, and avoid hiding drainage trays beneath containers that are difficult to move.
Leave some space between leaves and between pots. Crowding can reduce airflow, make pests harder to notice, and create damp areas where fallen leaves collect.
Use vertical space carefully. A narrow shelf or free-standing plant stand can increase growing room without taking up the whole floor. Make sure it is stable and positioned away from strong wind.
Hanging planters and railing containers may look space-efficient, but they are often more exposed and can be harder to water safely. Begin with floor pots or a low stand before adding overhead containers.
For a more detailed layout approach, How to Organise Plants in a Small Balcony explains how to balance growing room, access, light, and everyday use.
Build a Simple Watering Routine
New balcony gardeners often ask how many times per week plants should be watered. A fixed schedule is easy to remember, but it may not match the weather, plant, or container.
Instead, check the potting mix regularly. Push a finger a few centimetres below the surface where possible. If it still feels damp, the plant may not need water. If it feels dry at root level, water slowly and evenly.
Small pots, railing planters, grow bags, and plants near hot walls usually dry faster. Large containers in shaded, protected areas may remain moist for several days.
Water the potting mix rather than pouring over the whole plant. Add water slowly so it can spread through the root area. Empty excess water from saucers when it remains after the pot has drained.
During your first few weeks, write down which pots dry fastest. This small observation can help you group plants, change positions, or choose larger containers later.
Starter Setups for Different Balconies
There is no single correct layout for starting a balcony garden from scratch. The best first setup is one that suits the amount of light, space, and care you can realistically provide.
| Balcony Situation | Simple Starter Setup | Why It Can Work |
|---|---|---|
| Tiny sunny balcony | Three medium pots with compact herbs or vegetables | Keeps the setup productive without blocking the floor. |
| Balcony with two to four hours of sun | Leafy herbs, suitable greens, and partial-shade flowers | Uses the available light instead of forcing full-sun crops. |
| Hot west-facing balcony | Larger light-coloured pots in a protected section | Provides more moisture reserve and reduces direct pot heating. |
| Windy high-rise balcony | Low, stable floor pots near a sheltered wall | Reduces toppling and leaf damage. |
| Covered balcony with bright indirect light | Shade-tolerant plants in containers that drain well | Matches lower direct sun and slower drying. |
| Busy household | Three hardy plants in medium or large containers | Fewer pots and more soil volume make care easier to manage. |
What to Expect During the First Month
Your new balcony garden may not look full immediately. Freshly potted plants often spend time adjusting to new light, wind, temperatures, and root conditions.
Some plants may droop slightly after repotting, especially during warm weather. New growth is usually a more useful sign than expecting fast flowers or harvests.
The first month is mainly a learning period. Notice which pots dry quickly, which plants lean towards the light, where leaves are damaged by wind, and whether water collects in any trays.
A plant that struggles is not always evidence that you are bad at gardening. It may simply be in the wrong position, an undersized pot, unsuitable weather, or potting mix that is staying too wet or becoming dry too quickly.
Avoid making several changes at the same time. If you move the plant, repot it, add fertiliser, and change the watering routine together, it becomes difficult to know which change helped or caused more stress.
Troubleshooting a New Balcony Garden
Most early problems come from a mismatch between the plant, container, position, and watering routine. The table below can help you decide what to check before taking action.
| What You Notice | What May Be Happening | What to Check First |
|---|---|---|
| Soil dries again very quickly | The pot may be too small or exposed to heat and wind. | Check container size, wall heat, railing exposure, and potting mix condition. |
| Soil stays wet for many days | The area may be shaded, protected, cool, or poorly drained. | Check drainage holes, saucers, pot size, and watering frequency. |
| Plant grows tall and leans | It may be stretching towards stronger light. | Compare its position with brighter areas on the balcony. |
| Leaves look dry around the edges | Wind, reflected heat, or inconsistent moisture may be stressing the plant. | Check whether the pot sits near the railing or a hot wall. |
| Lower leaves turn yellow | The soil may be staying too wet, or the plant may be adjusting. | Feel the potting mix below the surface before adding water. |
| Water runs straight through | Dry potting mix may have pulled away from the pot wall. | Water slowly in two rounds and check whether the centre becomes damp. |
| Plants feel crowded after a few weeks | The mature size was larger than expected. | Move one or two pots rather than squeezing every plant together. |
Practical Tips for Beginners
A few simple habits can make your first balcony garden easier to manage and less expensive to adjust.
- Start with three to five plants rather than filling the balcony at once.
- Photograph the sunlight pattern at different times of day.
- Keep plant labels until you remember each plant’s basic needs.
- Place the thirstiest pots where they are easy to reach.
- Check potting mix before watering instead of following a strict calendar.
- Leave one open area for temporarily moving stressed plants.
- Add shelves, hanging pots, and larger crops only after the first setup feels manageable.
It can also help to take one photo of the balcony each week. Changes in growth, crowding, leaning, and leaf colour are often easier to notice when you compare images.
Common Starting Mistakes
Most beginner balcony garden mistakes come from trying to build too much before understanding the space.
- Buying plants before checking sunlight: Attractive plants may struggle if their light needs do not match the balcony.
- Using very small pots: Tiny containers leave little room for roots and may dry too quickly.
- Ignoring wind: A sunny spot near the railing may also be the most exposed area.
- Filling the whole balcony: Too many pots make watering, cleaning, and rearranging difficult.
- Watering every container equally: Different plants and pot sizes lose moisture at different rates.
- Choosing appearance over access: A beautiful arrangement can become frustrating if you cannot reach the soil or drainage trays.
Another common mistake is expecting the first layout to remain permanent. Balcony gardening involves adjustment. Plants grow, seasons change, shadows move, and your own routine becomes clearer with experience.
When Is the Best Time to Start?
You can start a balcony garden during most of the year if you choose plants suited to the current conditions. Mild weather is often easier because new plants are less likely to face extreme heat, cold, or drying wind while they establish.
During hot weather, begin with hardy plants, larger containers, and positions protected from harsh afternoon sun. Check moisture frequently during the first weeks.
During cooler weather, avoid watering automatically. Covered balconies may remain damp for longer, and young warm-season vegetables may grow slowly even when they receive enough light.
The best starting time is not only about the season. It is also when you have enough time to observe the plants during their first few weeks. Beginning just before a long trip can make it harder to notice how quickly each pot dries.
Balcony Haven Note: I have noticed that the most useful first setup is often smaller than people originally imagine. A few reachable pots leave enough room to watch the sunlight, notice wind exposure, and learn how quickly the soil dries without turning every watering day into a large job.
Quick Balcony Garden Checklist
Before buying or planting anything, use this checklist to make sure the basic parts of your setup are working together.
- Observe the balcony: Check direct sunlight, shade, wind, reflected heat, and rain exposure.
- Choose one growing area: Keep the doorway, walking path, and drainage access clear.
- Start with three to five plants: Choose plants suited to the conditions you actually have.
- Use suitable containers: Match the pot size to the mature plant and make sure drainage holes are open.
- Add quality potting mix: Avoid dense garden soil and leave space below the pot rim for watering.
- Place plants thoughtfully: Protect vulnerable plants from strong wind and harsh reflected heat.
- Check before watering: Feel below the soil surface rather than relying only on a calendar.
- Observe and adjust: Move pots or change the setup one step at a time as you learn.
You do not need every part of the garden to be perfect before you begin. You only need a setup that is small enough to observe, reach, water, and adjust.
Frequently Asked Questions
How do I start a balcony garden from scratch?
Begin by observing the sunlight, wind, rain exposure, heat, space, and drainage on your balcony. Choose one small growing area, add three to five suitable plants in containers with drainage, use quality potting mix, and check the soil regularly before watering.
How much does it cost to start a balcony garden?
The cost depends on the plants and containers you choose. A simple garden can begin with a few affordable nursery pots, potting mix, saucers, and a basic watering can. Reusing suitable containers can reduce costs, provided they are clean, stable, and have drainage holes.
How many plants should a beginner start with?
Three to five plants is a manageable starting point for many small balconies. This gives you enough variety to learn from without creating a large watering and maintenance routine immediately.
Can I start a balcony garden without direct sunlight?
Yes, but plant choice becomes more important. Bright indirect light can suit some leafy plants, shade-tolerant herbs, and ornamental plants. Fruiting vegetables generally need stronger light than foliage plants.
Can renters create a balcony garden?
Yes. Use portable floor pots, free-standing shelves, removable trays, and lightweight containers. Avoid drilling, permanent irrigation, or attaching heavy planters to railings unless your rental and building rules clearly allow it.
What is the easiest food to grow on a balcony?
The easiest choice depends on your light and weather. Chives, parsley, mint in its own pot, leafy greens in mild conditions, and some compact chilli varieties can be practical starting options when their needs match the balcony.
Final Thoughts
Starting a balcony garden from scratch becomes easier when you stop treating the balcony like a small backyard. Containers, wind, reflected heat, limited floor space, and apartment drainage all shape the way plants grow.
Start by reading the space. Observe where the sun moves, where wind enters, which walls become hot, and which areas stay protected. Then choose a small number of plants and containers that fit those conditions.
Your first balcony garden does not need to be complete. It only needs to be manageable enough for you to notice what works. As you learn which pots dry quickly, which positions provide useful light, and which plants suit your routine, you can expand with more confidence.
A successful balcony garden usually develops through observation and adjustment rather than one perfect shopping trip. Start small, keep the space usable, and let the balcony show you what to add next.
Leave a Reply